
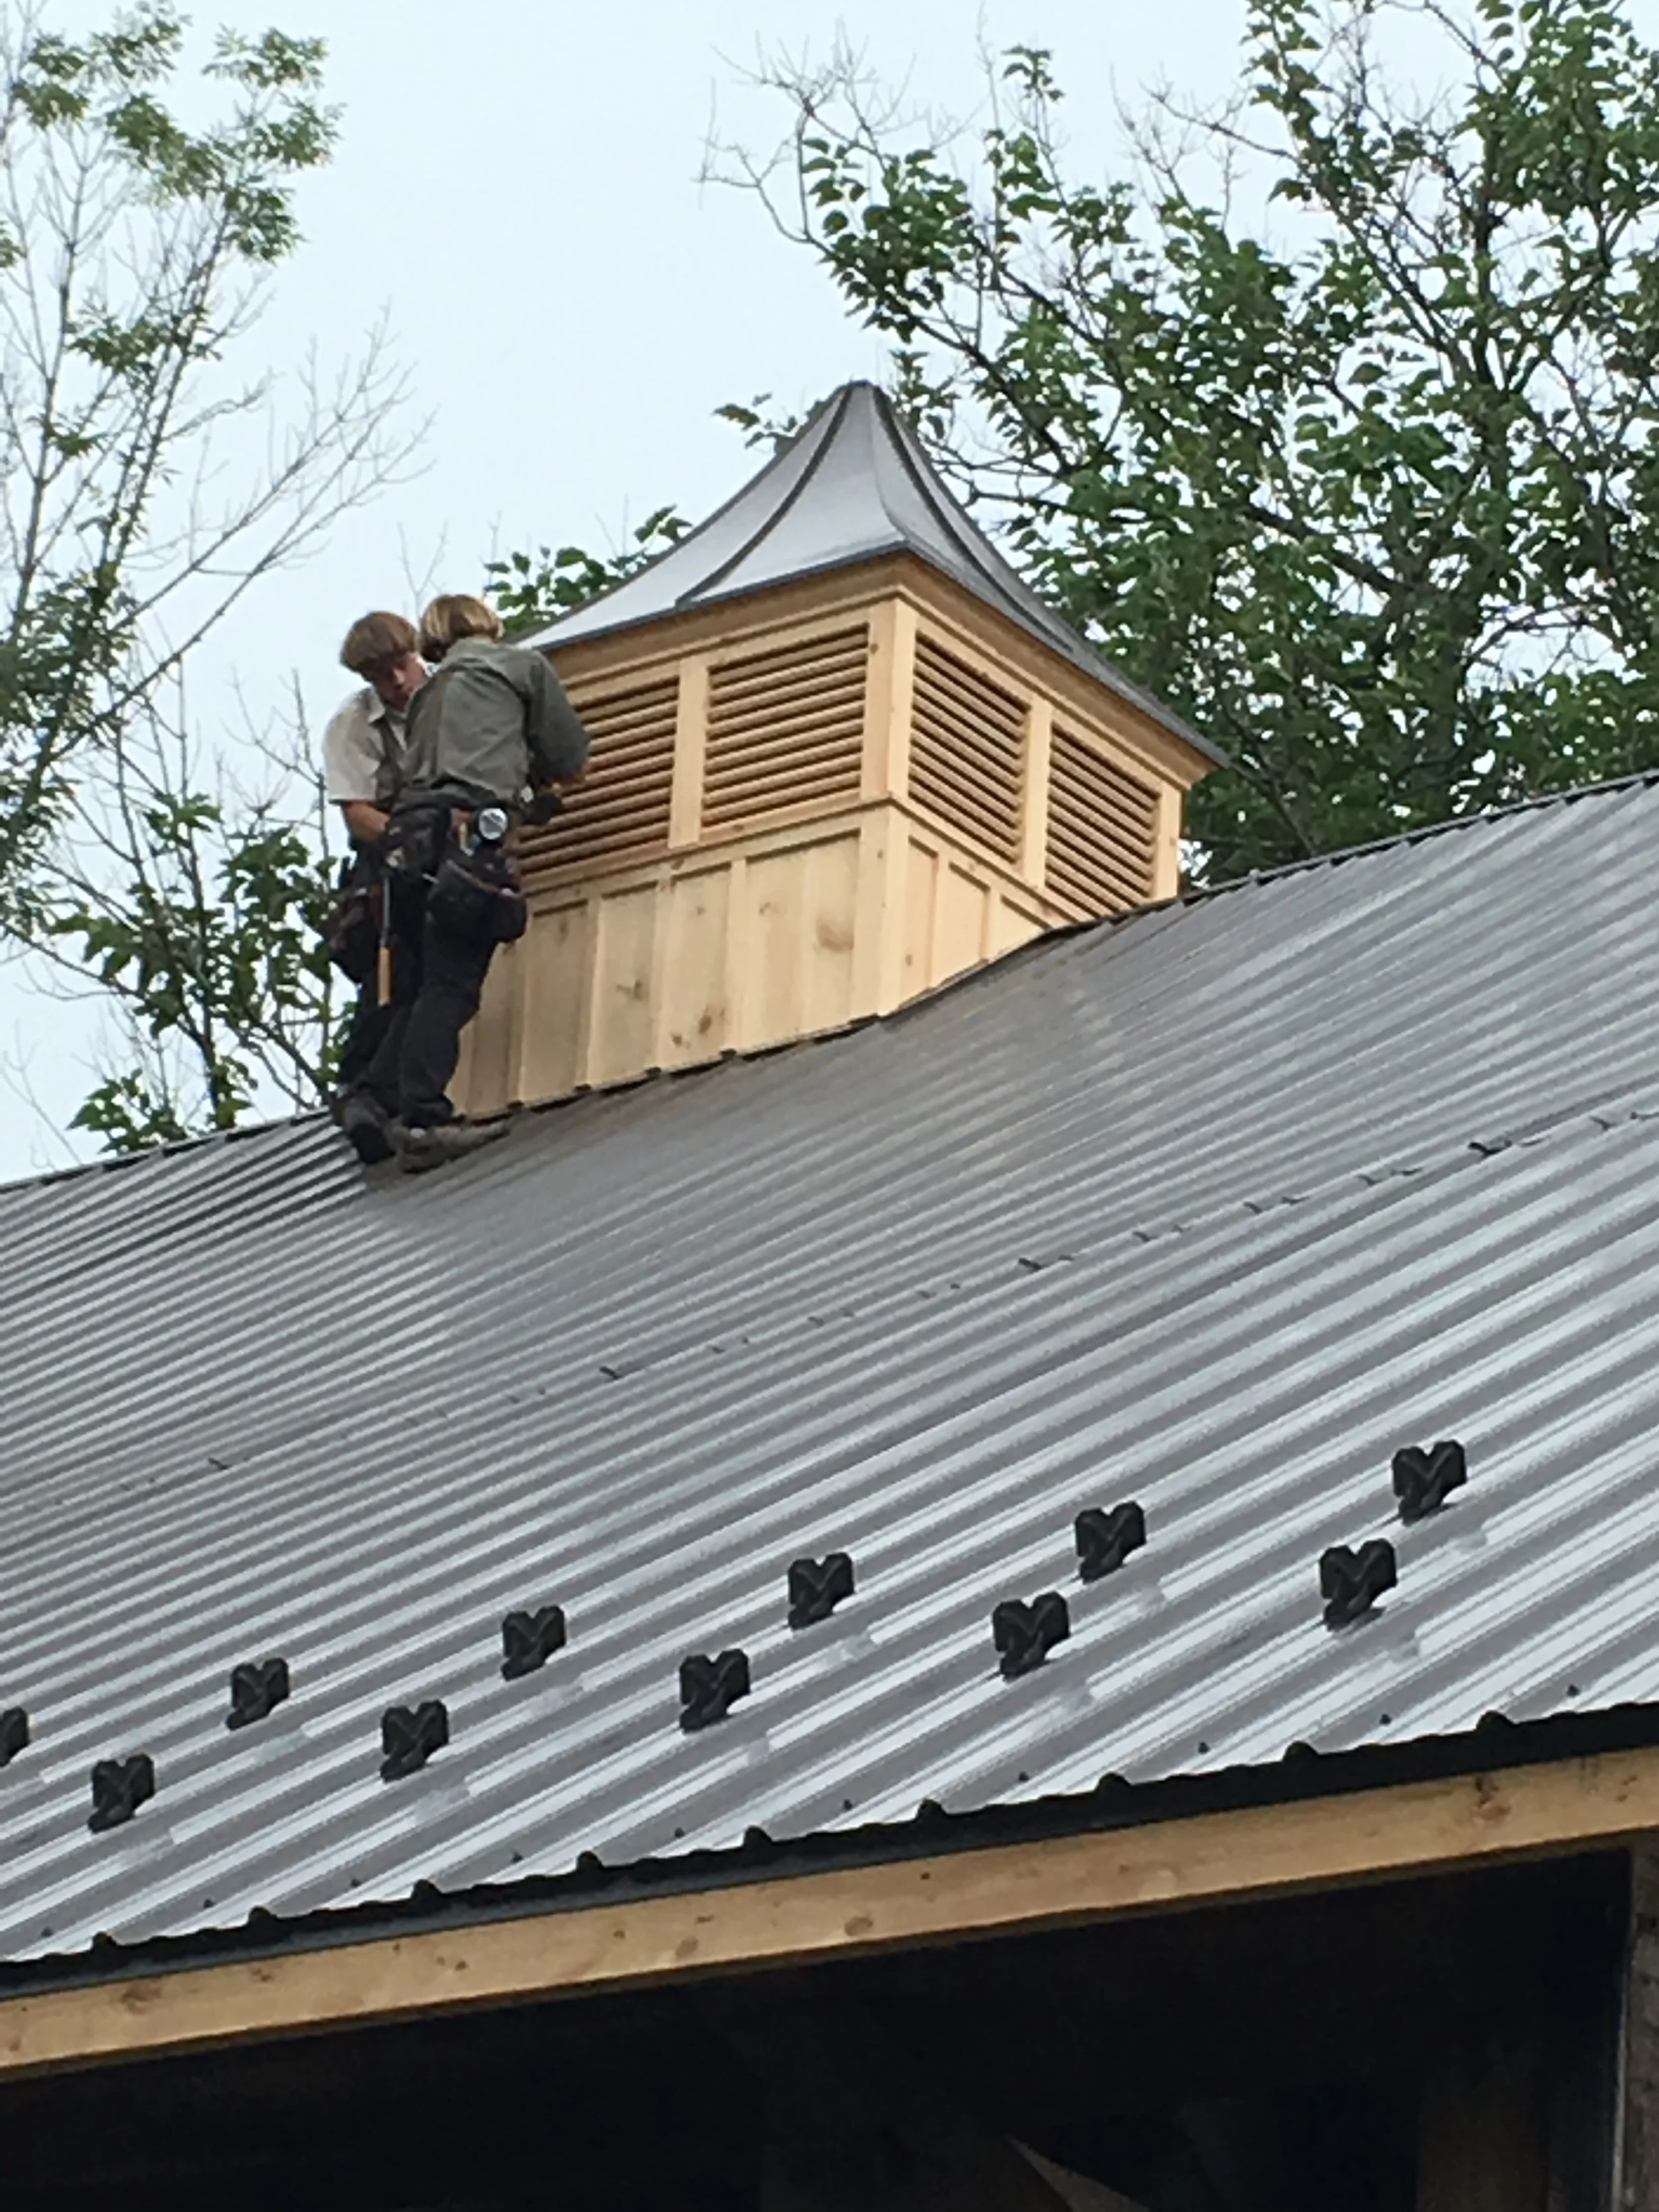
The "Cupola" went on today.....
When we started planning the renovation we never really thought about all of the little details to plan as part of the restoration. When Christian our builder asked us if we would like a Cupola, I really had no idea what he was talking about.

When we started planning the renovation we never really thought about all of the little details to plan as part of the restoration. When Christian our builder asked us if we would like a Cupola, I really had no idea what he was talking about. So after a little explaining, a "Cupola" is basically the small structure that goes on the top of the roof that can provide ventilation to the building and also acts as a ground for lightening storms. You see these on barns across the country in all different shapes and sizes. Since our barn is relatively large, our Cupola is actually 5 feet by 5 feet. It was quite large close up. But now that its up on the roof it looks perfect.
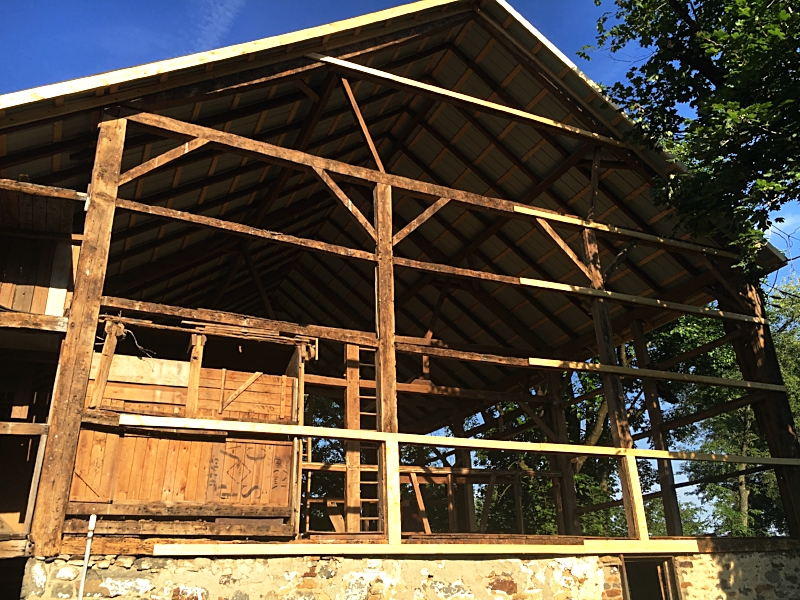
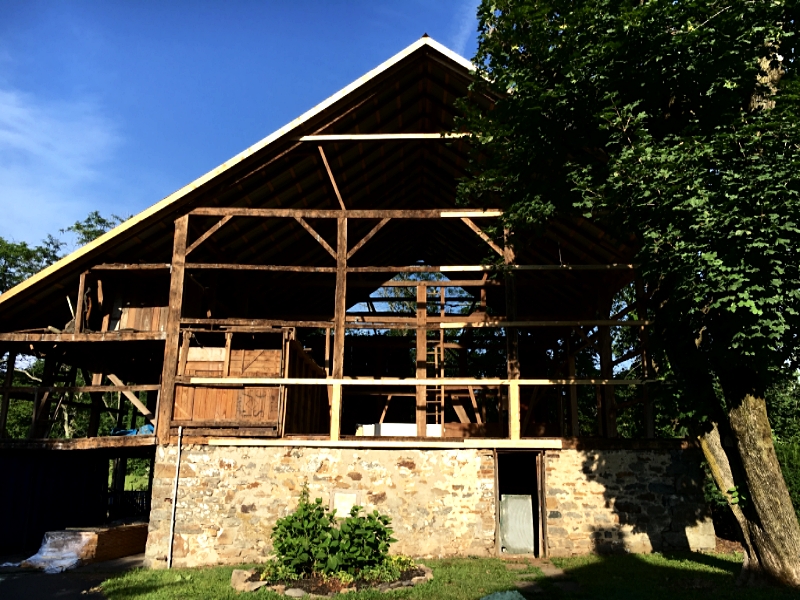
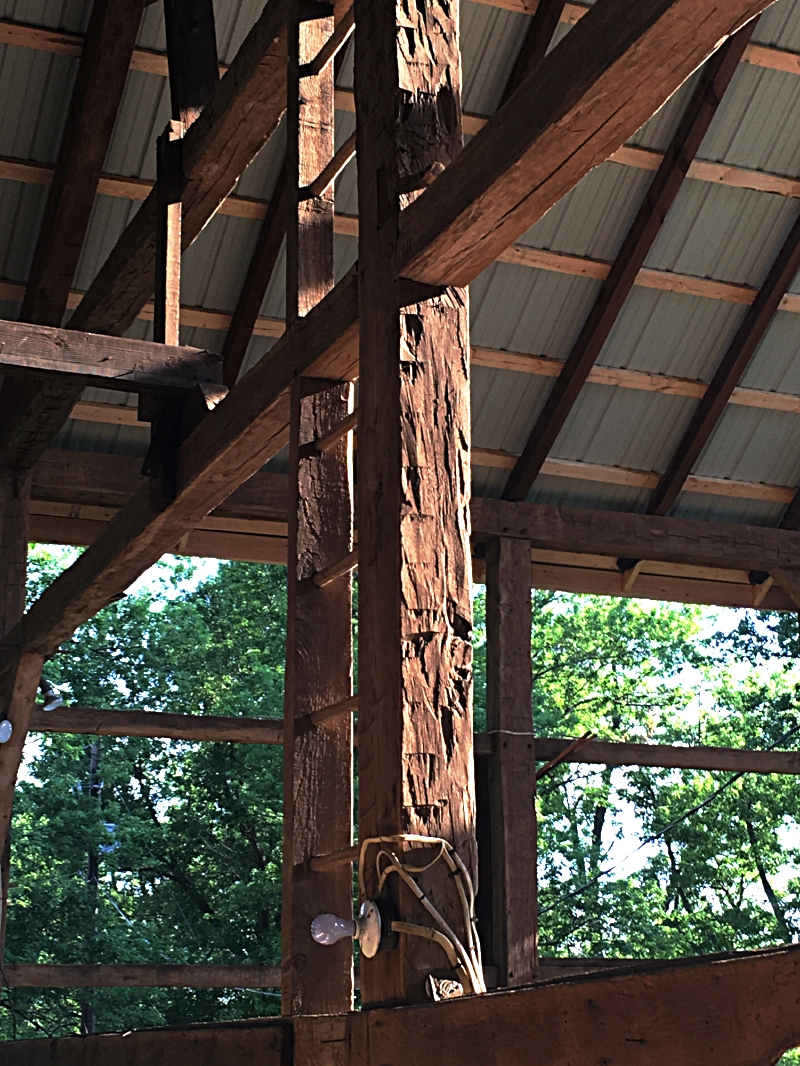
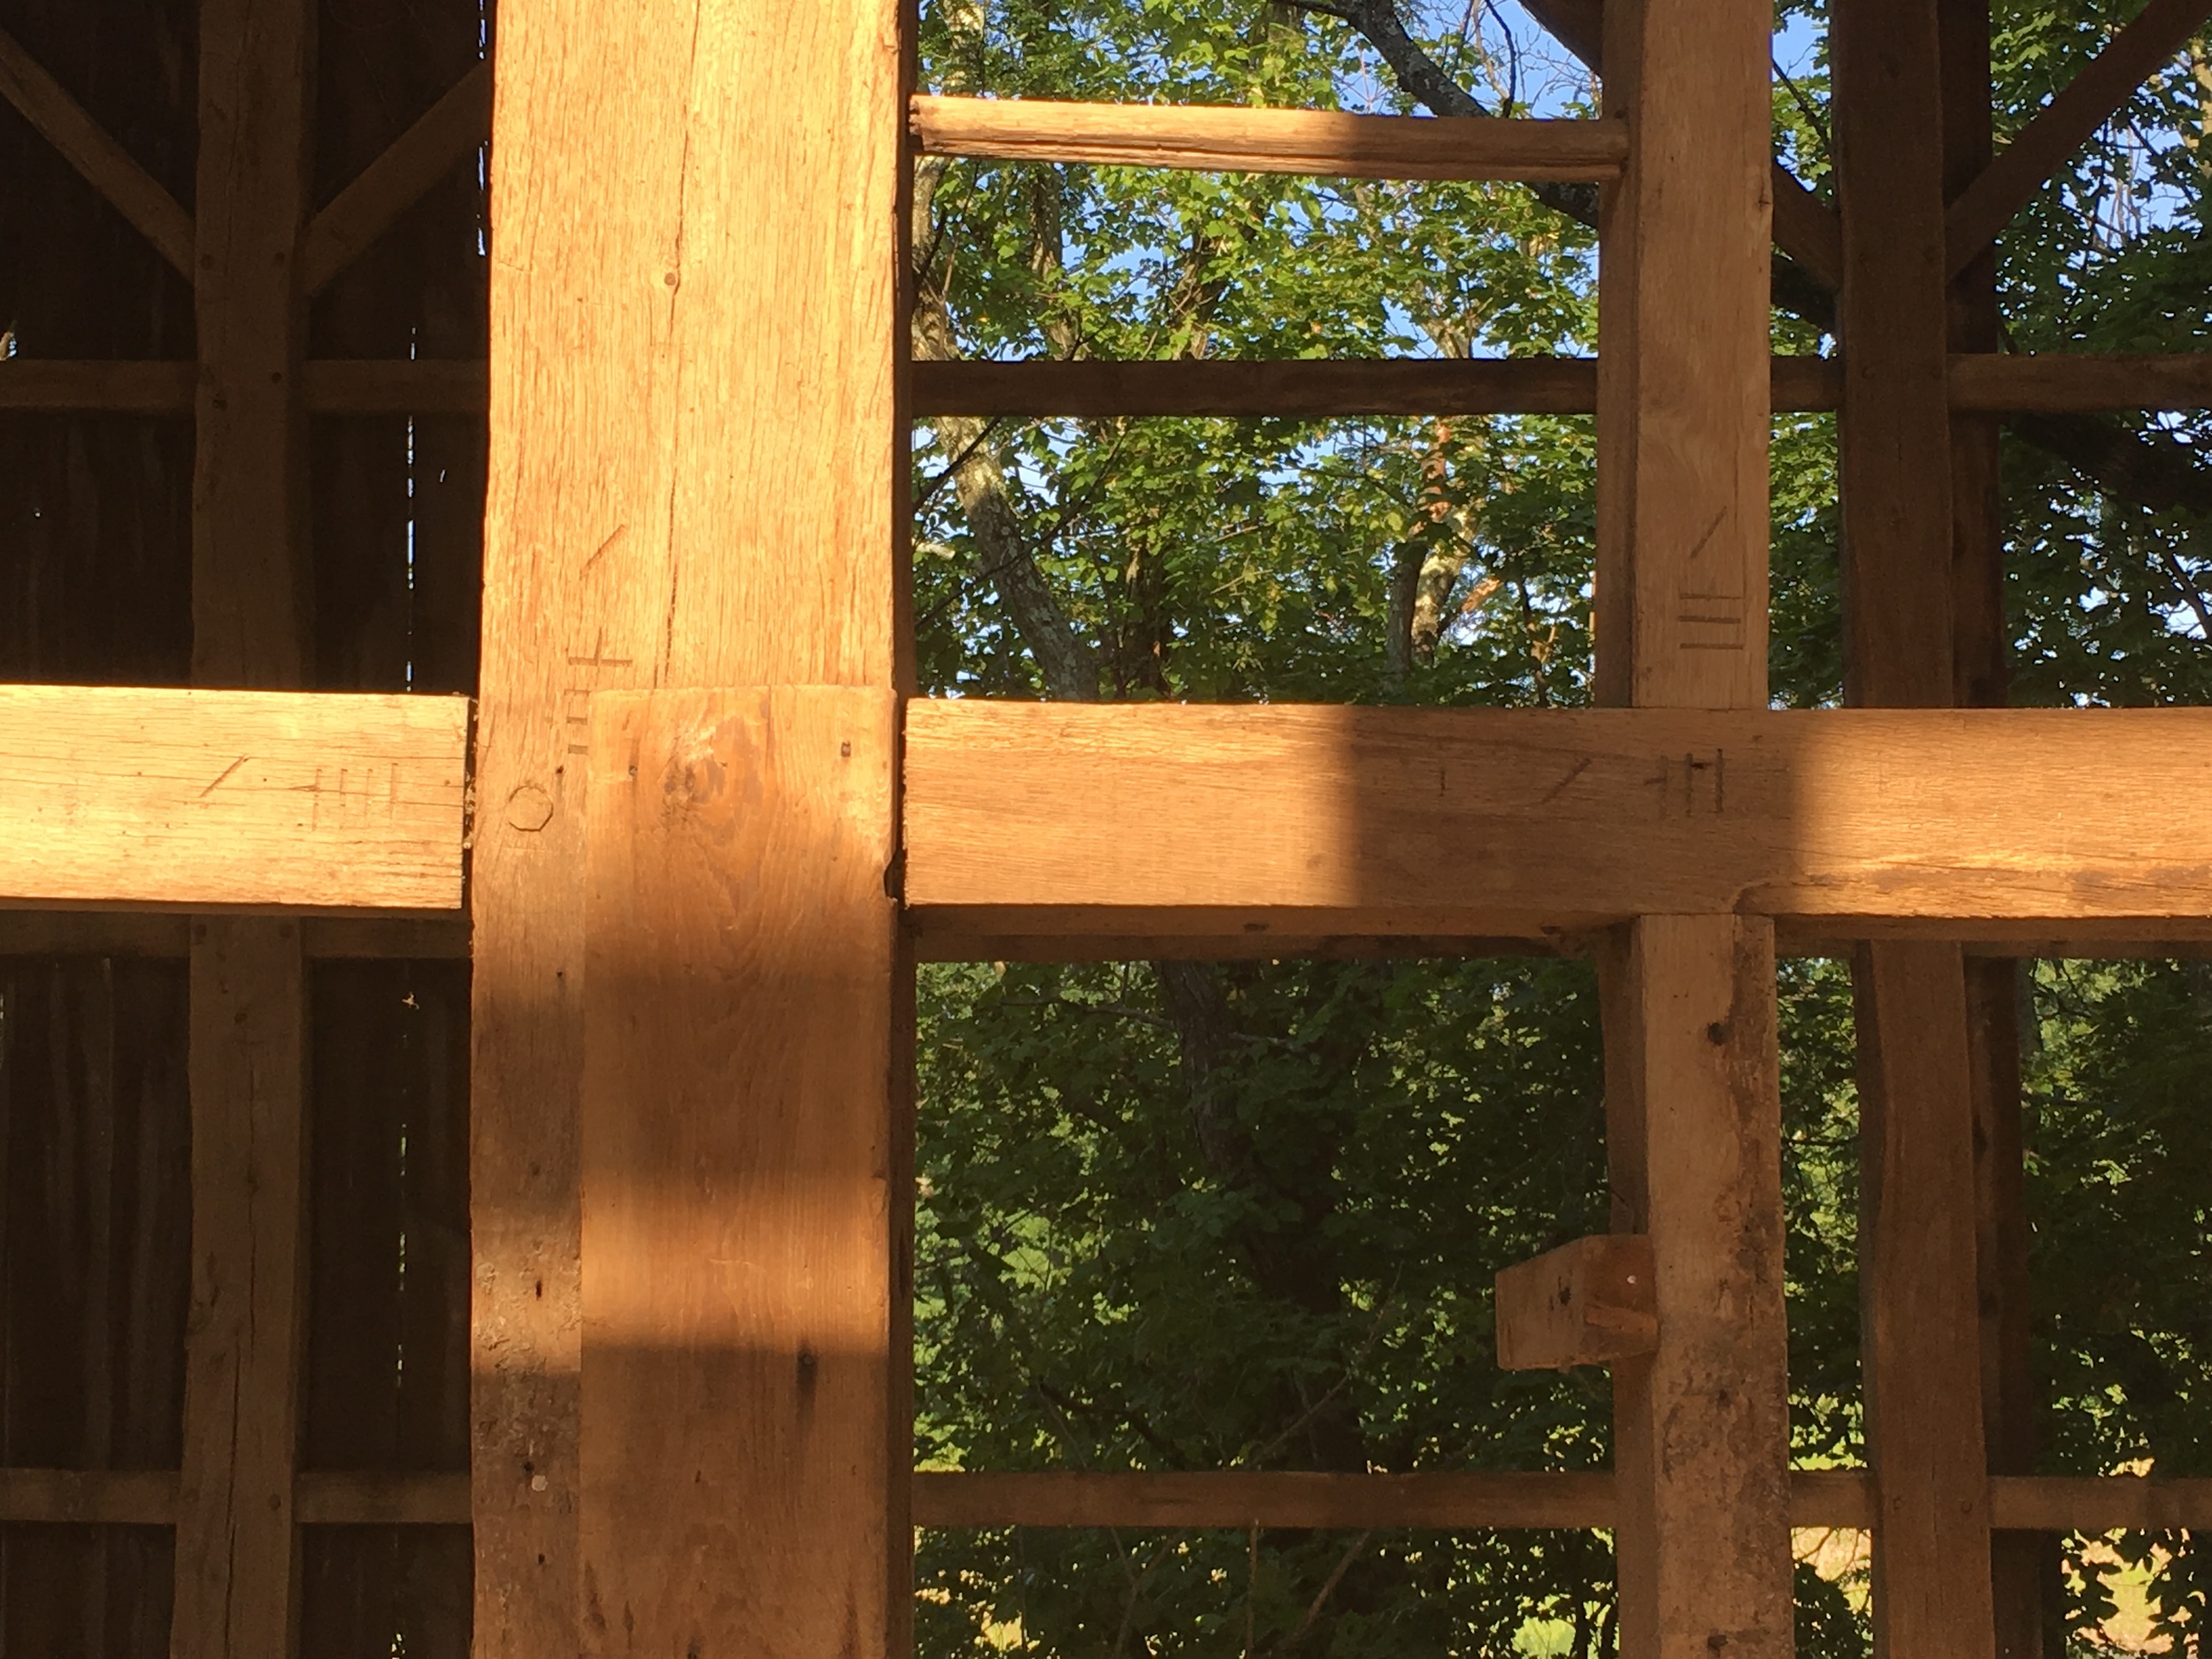
In addition, you can see from the pictures that they are placing new boards on the outside of the beams. These will help to reinforce the structure of the barn, but once the siding goes on you will not be able to see them from the inside. The goal is to maintain the structure of the barn on the inside so you can still see all of the old beams that the barn was built with back in the 1800's.
We are really excited with the progress. There is still a lot to be done, but Christian and his team are working extremely hard to make every last detail perfect.
Until next time....
Warmly,
Chris & Becca Lynde


Taco Tuesday at "The Farm"
Although we love to have our traditional Mexican inspired dishes on Thursday's, in the summer we love to add in some great Fish Tacos. I remember a few years ago when Chris told me he was going to make Fish Tacos, lets just say I was not very excited about them.

Although we love to have our traditional Mexican inspired dishes on Thursday's, in the summer we love to add in some great Fish Tacos. I remember a few years ago when Chris told me he was going to make Fish Tacos, lets just say I was not very excited about them. However, after tasting them, they are now a staple at our house, especially in the summer. These Fish Tacos, are light, fresh, and bursting with flavor. Not to mention, we have added a few nice healthy twists to these to keep the calories down.
We hope you enjoy these as much as we do!
Warmly,
Becca
Fish Tacos with Guacamole and Chipotle Cream
(Yield: 4 servings)
Ingredients:
- 1.5 lbs. white fish (cod is a great fish, but you can really use any fish)
- 1 box hard-shell tacos (I use the blue corn, stand and stuff yellow is good too)
- ½ red cabbage shredded
- non-stick spray, either olive oil or canola oil
- salt and pepper to taste
Instructions:
- Pre-Heat oven to 400 degree F.
- Spray a sheet pan with the oil then arrange the fish on the sheet pan. Fish should not be touching. Then spray the top of the fish with oil and season with salt and pepper. Set this aside while you assemble the toppings
Guacamole
Ingredients:
- 3 Avocados
- Juice of 1 lemon and 1 lime
- Half red onion, ¼” dice
- Handful of cilantro
- 2 medium-sized vine ripe tomatoes, ¼” dice
- Salt and Pepper to taste
Instructions:
- Split the avocado and remove the pit, score the avocado in a grid pattern, then scoop the pulp into a medium-size bowl.
- Add the lemon/lime juice to the bowl and stir.
- Add the remaining ingredients, then season with salt and pepper to taste.
- Put your fish in now.
- And follow the instructions for baking the shells on the packaging.
Chipotle Cream
Ingredients:
- 1/4 c. plain greek yogurt
- 1/8 c. almond milk (any milk will do)
- 2 tbs. chipotle sauce (I find this in the Mexican food section)
- Salt and pepper to taste
Instructions:
- Combine all ingredients in a small bowl until smooth. It should be the consistency of heavy cream
- To plate add the fish first (I take a spatula and break the fish into strips) to the shell, then layer the chipotle crème, guacamole, then shredded cabbage.


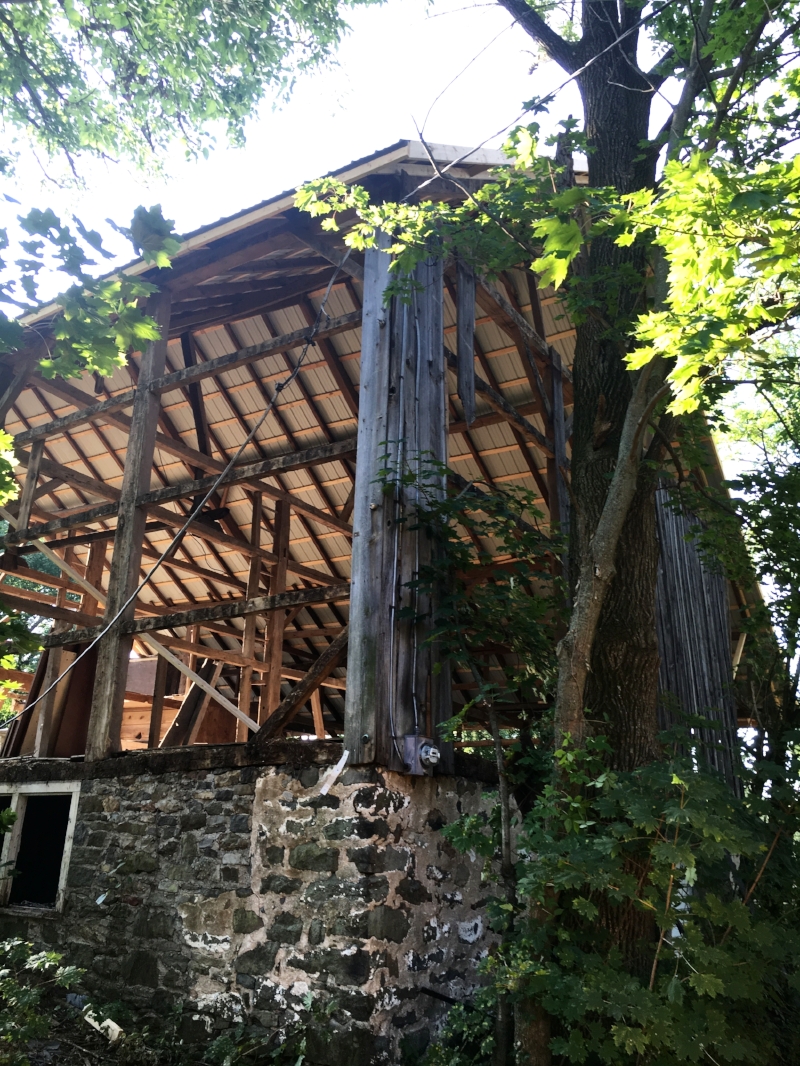
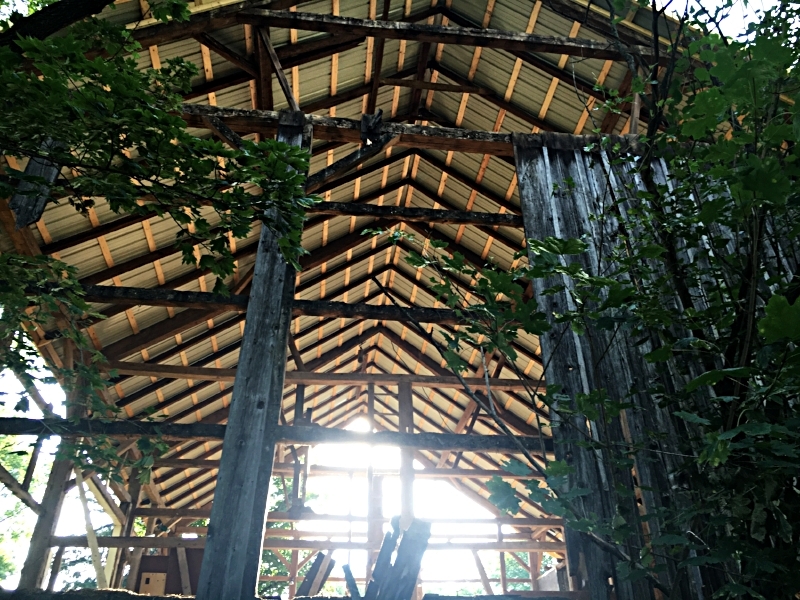
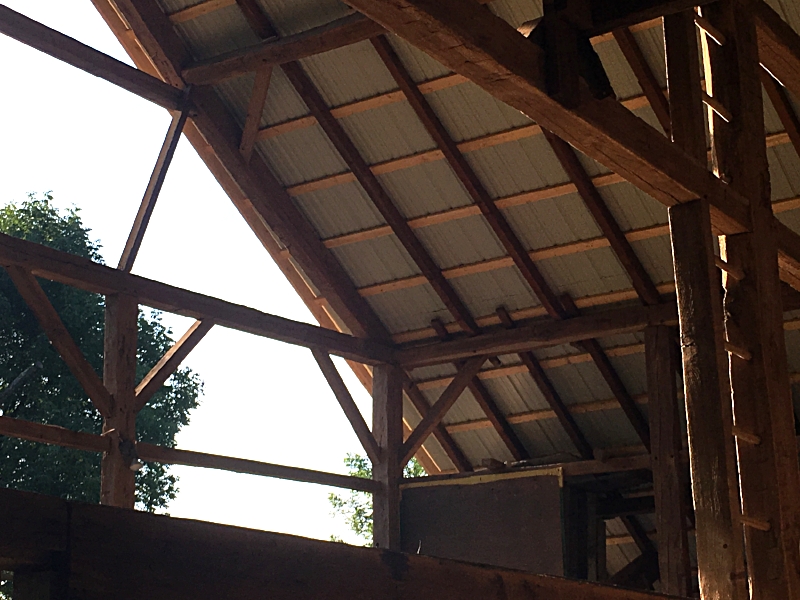
The "New" Roof is on......
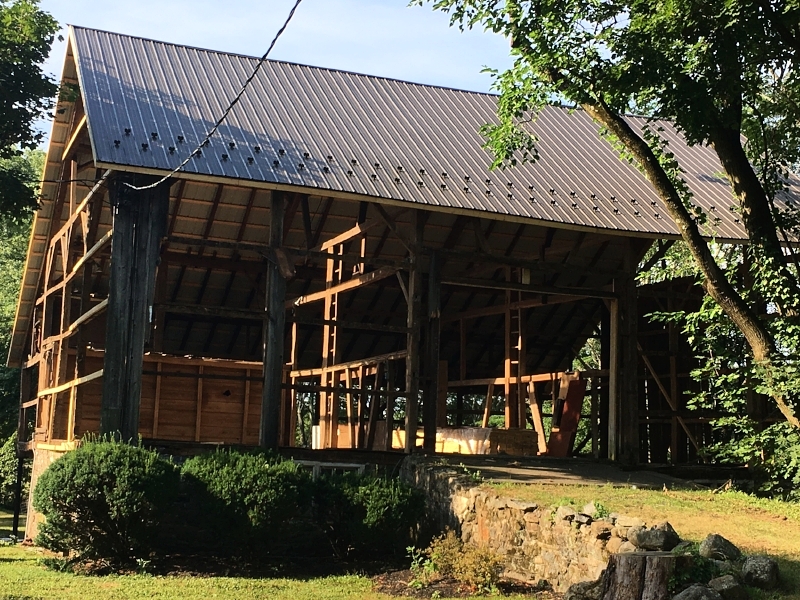
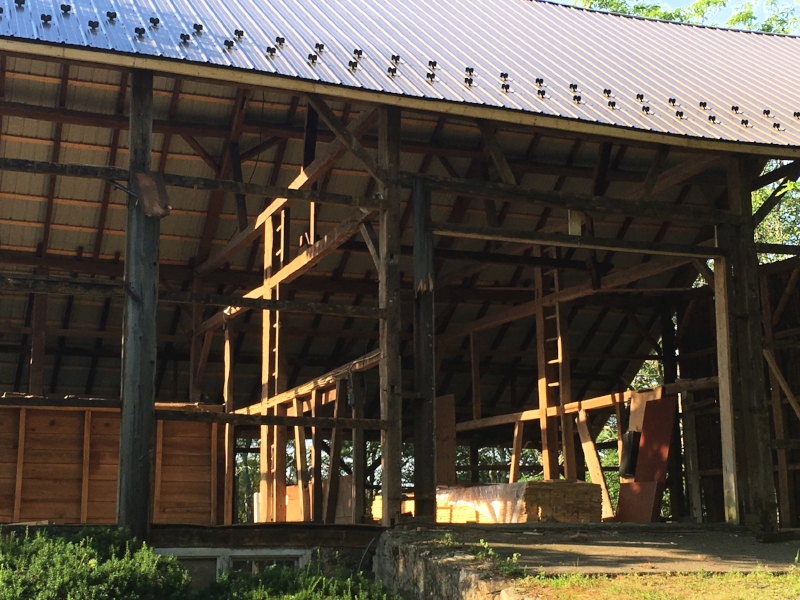
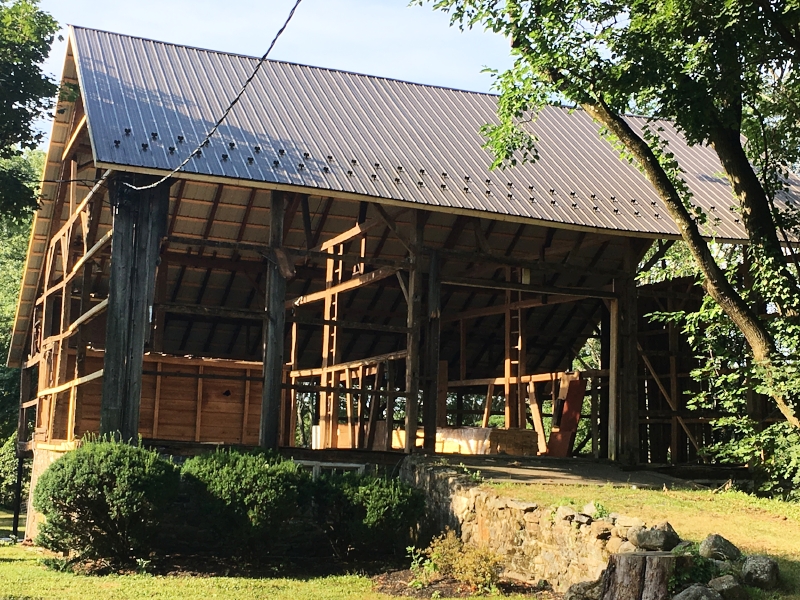
It is truly amazing to watch these hard-working Amish gentlemen take the barn down piece by piece and then re-build it. They started with the roof. Their goal is to remove the old roof, reinforce the rafters and then put the new roof back on as quickly as possible to protect the structure and wood on the interior of the barn. We have been praying daily over all of these men to keep them safe, especially with how high the barn roof is, its actually kind of scary to watch. The project was started a little over a week ago and the roof is completely finished! It really looks amazing and had we not started this renovation I'm not quite sure how much longer that old roof would have lasted. There were actually two layers that needed to be removed, the old first shingle layer and then someone years ago must of repaired the roof by just placing slate shingles over top. The weight of the roof was so heavy that some of the rafters and beams had started to bend. They were able fix all of the issues and the roof looks amazing.
We still have a long way to go, but it's really exciting to see the progress!! I cannot wait to see the new windows and big barn doors that will go in to add some light on the inside and make "The Barn" a really special place to host a wedding or event! Here are some of the pictures so far! Make sure to sign up for our Newsletter for our weekly updates on "The Barn" renovation!! Check out this sneak peak on what the future holds.
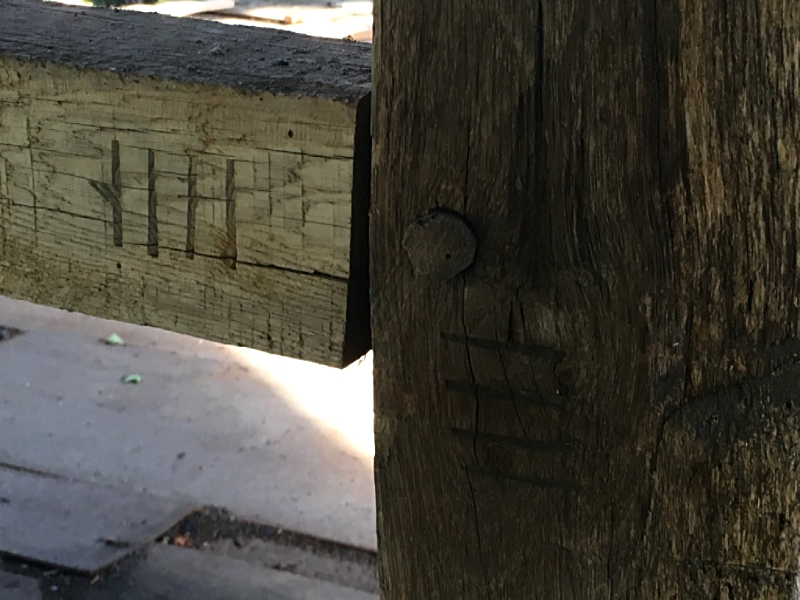


One last thing, my Dad heard that every barn has a coin that is put in when it was originally built. We are still looking for the coin in hopes to find the exact year that the barn was built. Has anyone else heard this? When we asked our Amish builders they had not heard of it before, but we are still hopeful.
We continue to trust God every step of the way!!!
-Chris & Becca
"We live by faith, not by sight."
2 Corinthians 5:7

My Favorite Chocolate Zucchini Muffins!!!
I wish I could tell you that I developed this recipe, but this recipe is just perfect the way it is. I try to find ways to sneak vegetables into my desserts/muffins so they are not empty calories. These particular muffins are great to make for a kids birthday party at school because they are grain-free, gluten-free and nut-free.
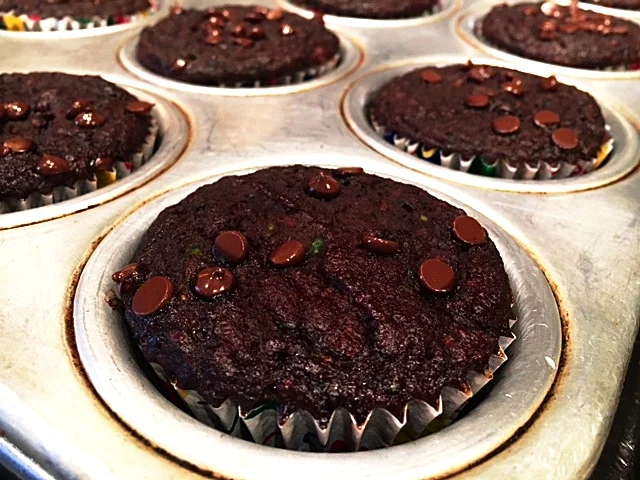
I wish I could tell you that I developed this recipe, but this recipe is just perfect the way it is. I try to find ways to sneak vegetables into my desserts/muffins so they are not empty calories. These particular muffins are great to make for a kids birthday party at school because they are grain-free, gluten-free and nut-free. They also taste great for a quick breakfast on-the-go. You can make-ahead and freeze, pop them in the microwave for about 20 seconds and they taste like you just pulled them out of the oven. When I make these for breakfast I will cut the chocolate chips in 1/2 or even just eliminate them. They taste just as good without the chocolate chips, but make it a great treat for a birthday party.
I sent these into school for Gracie's 8th birthday this past year and all of the kids loved them. They had no idea what they were eating!!!
Check out the recipe on one of my favorite websites Against All Grain. Danielle Walker has a host of great allergy friendly recipes on her site. I've also downloaded her Cookery App and bought her cook-book. I use them both weekly!!
Enjoy! - Becca


What do you do with all of your Squash and Zucchini in the Summer?
We love the summer because we always have a ton of fresh vegetables on hand. We joined Good Work Farm CSA this summer and their weekly share has been absolutely amazing. We would like to say that since we live on a FARM we grow this enormous garden, but we've quickly learned that God did not give us the gift of growing vegetables after trying to plant a huge garden that went belly up.
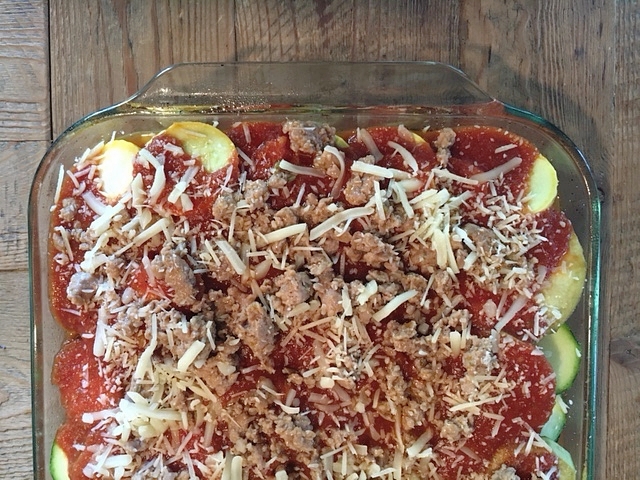
We love the summer because we always have a ton of fresh vegetables on hand. We joined Good Work Farm CSA this summer and their weekly share has been absolutely amazing. We would like to say that since we live on a FARM we grow this enormous garden, but we've quickly learned that God did not give us the gift of growing vegetables after trying to plant a huge garden that went belly up. However I'm happy to say we love making all kinds of new things with the abundance of fresh vegetables in the summer. We had a ton of Zucchini and Summer Squash on hand, so Chris decided to throw together Lasagna, but instead of the noodles we used Zucchini, Squash and Eggplant!! The end-result was an empty pan and everyone wanting more!
We hope you enjoy this recipe. This will definitely be added to our staple of favorites.
Warmly,
-Chris & Becca Lynde
Summer Lasagna
Serves 6-8
Ingredients:
- 2 lbs of De-Cased Chicken Sausage
- 2 Small to Medium Sized Eggplant - Peeled and Sliced into 1/4 inch thick coins
- 2 Medium Sized Zucchini - Sliced into 1/4 inch thick coins
- 2 Medium Sized Yellow Squash - Sliced into 1/4 inch thick coins
- 1 1/2 Jars of Tomato Sauce - Either your favorite Recipe or your Favorite Brand of Sauce
- 1 6oz Bag of Organic Part-Skim Shredded Mozzarella - We used Nature's Promise
- 3/4 cup of Parmesan Cheese
- Organic Non-Stick Olive Oil Spray
- Salt & Pepper to Taste
Instructions:
Step 1: Pre-heat oven to 375 degrees. Spray 9 X 11 Glass Pan with Non-Stick Olive Oil Spray.
Step 2: Add 2lbs of De-Cased Chicken Sausage to an oiled pan. Season with salt and pepper. Cook on medium until cooked through. While cooking, make sure you break-up sausage so it resembles ground turkey/beef. You can also use a ground beef or ground turkey in place of the chicken sausage.
Step 3: Layer the bottom of the sprayed pan with a variety of the vegetables. Be sure when you are layering you cover the entire bottom with the vegetables, by overlapping them so you do not see the bottom of the glass pan.
Step 4: Add a thin layer of sauce to cover the vegetables.
Step 5: Add 1/3 of the cooked meat.
Step 6: Top with 1/4 c Parmesan Cheese and 1/3 c of Mozzarella Cheese.
Repeat Steps 3-6 two more times.
Step 7: Bake for about 30 minutes or until you see bubbles around the sides of the pan. Make sure vegetables are tender and cheese is melted through. Test with a knife to see the tenderness of the vegetables.
Step 8: Let cool for 10 minutes before cutting and serving.